Mini Lemon Cheesecakes

I wanted to make my boyfriend’s birthday perfect. I went all out with banners, balloons, confetti and a pile of beautifully wrapped presents but as a baker, I knew the showstopper had to be the cake. Dilemma… his favourite dessert is cheesecake but I wanted to make him an actual birthday cake… Solution… MAKE BOTH! The result… A rum and raisin cake surrounded by mini lemon cheesecakes.

DSC_0837

I’m so glad that I decided to make both, he was so excitable all day and we gorged ourselves on cake throughout the day. Better start planning now to top it for next year!

I found this recipe for individual cheesecakes but I wanted to give them a real punch of lemon flavour so I omitted the raspberries and substituted the lime zest for lemon. I also used this recipe to make a batch of lemon curd, which I topped the cheesecakes with and there was plenty left over for smothering toast – yum! (Such a hard life when there are leftover goodies that just have to be used up isn’t it?)
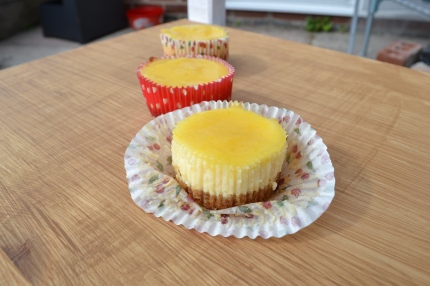
DSC_0841It may look like there’s a fairly thin layer of curd on top but because the lemon is so tangy in the curd and so subtle and creamy in the cheesecake, it’s the perfect amount to compliment each other. I also substituted half of the digestive biscuits for amaretti biscuits for an Italian twist and hint of almond.

Gone Crackers!

 DSC_0826   So we’re in the second week of the Great British Bake Off and it was biscuit week! That and my boyfriend and I had the sudden and insatiable need to eat cheese and crackers one evening led to my first attempt (and of course, experimentation) at making crackers! I decided to use a basic recipe for crackers and add different flavours. The recipe I chose was:  

http://www.thekitchn.com/how-to-make-crackers-at-home-cooking-lessons-from-the-kitchn-186144

It proved to be a great basic recipe, although I think next time I’ll roll mine slightly thinner to get more of a snap when you bite into the cracker. I tested multiple toppings including sesame seeds, smoked paprika, garlic salt and parmesan and olive. The parmesan and olive worked particularly well, as did the garlic salt; I think the latter would work best with cheese. I’ll definitely be trying this recipe again soon to perfect my favourite cracker!

DSC_0831

The Wedding Cake Saga Part 1

DSC_0821

I hear wedding bells!! Two of my good friends have got engaged recently and have asked me to make their wedding cake! Your wedding cake is obviously a huge thing so I’m honoured to make one for such good friends. It’s going to be a long journey with lots of cake testing (it’s a hard life isn’t it?) and I thought you lovely readers might want to follow the journey so here’s part 1!

My friends are planning some really interesting things for their wedding and want to surprise people and that includes the cake… How do you surprise someone with cake I hear you ask? And no, I’m not planning on jumping out at people with cupcakes… I’m planning hidden designs and surprising, unique flavours.

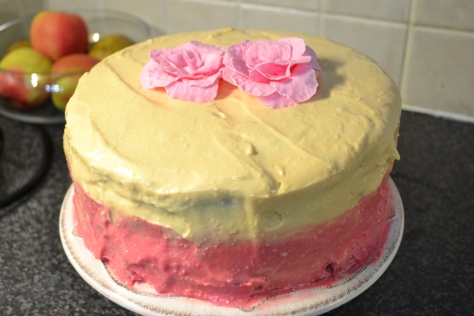
The plan is to have a three tier cake, decorated with ombre style icing. I’ve not fully iced many cakes because I’m a big fan of buttercream and just haven’t attempted it much. Nonetheless, when I saw this ombre cake in BBC Good Food Magazine, I couldn’t wait to try it and it immediately sprung to mind when I was asked to make a wedding cake.

http://www.bbcgoodfood.com/recipes/raspberry-caramel-ombre-cake

The cake itself was just a necessary perk and was moist and rich and full of caramel with bursts of raspberry.

DSC_0824

The icing was what I really focussed on… Unfortunately, I had to run out of the house in the middle of making the icing so it had to go in the fridge for an hour or so and had a few lumps as a result but never fear! The graduated colour was what I really wanted to practise and I was surprised at how beautiful it looked. I definitely love this style and will be trying it again with a range of different icing types and colours to find out the best combination for covering the wedding cake.

This was also the first time I’ve ever made anything out of icing and I chose to make pink roses as my first attempt. What do you think?

DSC_0822

The next part of the saga will probably be practising the bottom tier… a checker board Battenberg cake! I know you’re all dying to see what that becomes of so keep your eyes peeled for the next installment!

Oreo Cupcakes

At risk of being pelted with cake decorations, I am about to make a dangerous admission… I don’t like cupcakes. At least, I don’t like what cupcakes have become during the cupcake boom of the past few years. When I was growing up, if a cake was made at home and individually sized, it was called a fairy cake and cupcakes came in a pack of six from Lyon’s, they were chocolate flavoured and distinctly flat (and absolutely delicious I must add). 


However, for the past few years, cupcakes have become the fairy cake’s more dominant big brother and, for my liking anyway, have been covered in too much glitter. The frosting is crunchy and grates on the teeth and I generally preferred the buttercream topped fairy cake, perhaps with some sneaky sprinkles. Or so I thought and I have avoided cup cakes ever since until my boyfriend’s sister suggested I try making oreo cupcakes. I have been obsessed with oreos for years and they can lure me into most recipes so I decided to give it a go. What did I discover? Those crunchily iced, hard cup cakes were an unfortunate incident that’s kept me from enjoying cup cakes all these years. Apparently, if cup cakes are done right, or at least home made, they can taste delicious and have endless possibilities. My faith in the cup cake has been restored! 

I particularly loved this recipe because there is half an oreo nestled at the bottom of each cup cake and the frosting was spot on – not too sickly but tasted enough of oreo to tie the cake together like an oreo cake sandwich. My boyfriend and I both agreed that they were absolutely delicious but would have benefited from a layer of jam above the oreo just to give it a kick and next time I make these, I’ll definitely be trying that for a sudden burst of fruity flavour amongst the chocolate. I’ve always enjoyed the combination of oreo and strawberry anyway so I think it would work really well. 


photo-13


The recipe can be found here: 

http://uktv.co.uk/food/recipe/aid/657083

It says makes 11 but I only managed to get 9 out of my mix but maybe I just like extra large cupcakes… 

Rum and Raisin Shortbread!

Apologies for the recent hiatus; I won’t bore you with the details but let’s just say a break up and a fire are just highlights of what has turned my life upside down over the last few months – there’s been more going on than in a soap!

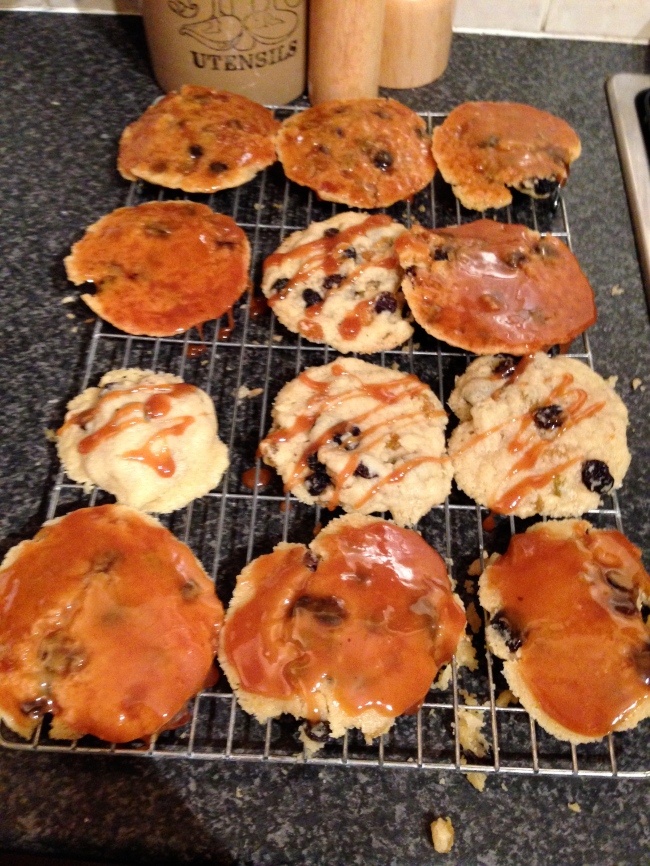
Anyway, more importantly, I have discovered spiced rum… It’s such a unique taste and really stands up well in baking. I’ve been making shortbread a lot recently and it’s one of my boyfriend’s favourite things for me to bake. His favourite ice cream flavour is rum and raisin and one day, I suddenly thought about combining the two and thus, rum and raisin shortbread was born! I soaked the raisins in rum before putting them into the shortbread and then used the leftover raisin rum to soften fudge and then drizzled the fudge over the base of the biscuits to add a little extra! These are so popular, I get asked to make them all the time; they’re smooth for a shortbread and everyone just loves them; give them a go yourself and see! (Please excuse the photo, it was only a quick snap and they were eaten too quickly for me to take proper photos!)

Rum and Raisin Shortbread

Ingredients

225g unsalted butter

100g caster sugar

225g plain flour

1/2 teaspoon baking powder

1/4 teaspoon salt

185g raisins (I use a mix of golden and flame raisins but any will do)

Spiced rum (enough to cover the raisins in the pan)

Ready made, soft fudge (amount depends on how much fudge you want on each biscuit)

Method

  • Place the raisins in a saucepan and add the spiced rum so that it almost cover the raisins.
  • Preheat the oven to 150C/Gas 2
  • In a bowl, cream together the butter and sugar until fully incorporated and fluffy.
  • Mix together the flour, baking powder and salt in a separate bowl. Gradually stir the dry ingredients into the butter and sugar mixture.
  • Remove the raisins from the rum and stir them into the biscuit mixture until equally incorporated.
  • Roll the dough into walnut sized balls and place on ungreased baking trays about an inch apart to allow for spreading. Flatten the biscuits slightly.
  • Bake for 15 to 20 minutes until they no longer look wet but are only just starting to brown at the edges.
  • Remove from the oven and let them cool for about 10 minutes on the tray and then remove to a wire rack to cool completely.
  • Whilst cooling, place the fudge in a saucepan over a low heat and place about a tablespoon of the raisin rum over the fudge. Allow the fudge to melt completely and add more rum to taste.
  • When the biscuits are cool, turn them over and drizzle the liquid fudge over them.
  • Allow the fudge to harden slightly and then enjoy!

Image


Turtle Cheesecake (and no it’s not made with turtles!)

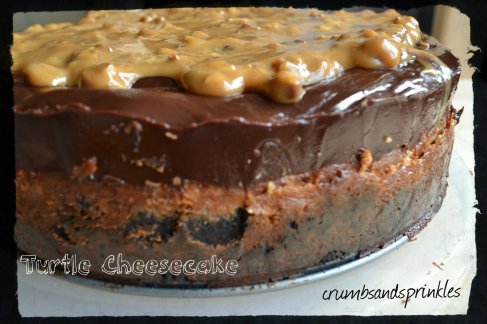
Who doesn’t like a good cheesecake? I am certainly addicted to them but for some reason, I’ve never tried to make one. However, this all changed when the guys at work kept talking about how much they love cheesecake and how I should make one. I’d recently read a blog post over at the brown-eyed baker about a turtle cheesecake that consisted of oreo base, caramel and pecans, vanilla cheesecake and chocolate ganache. The moment I mentioned this to everyone at work, they insisted on me trying to make it and wow am I glad I tried.

This is undoubtedly the best cheesecake I have ever eaten and my colleagues definitely agreed. An oreo base is always a great start to a cheesecake but this cheesecake was so decadent and delicious. The vanilla cheesecake was smooth and flavoursome and I thought that the combination of such rich elements would be too much but it wasn’t, the balance was exactly right and I could definitely easily eat a whole slice. For those of you who are a bit confused about the name, I was too when I first read it because in the UK, we don’t have turtle sweets! All I know is that turtles are American sweets that look like turtles and consist of caramel, nuts and chocolate. Don’t worry, it’s not real turtle!

Image

I used the recipe here.

It was time consuming but was simple to do and definitely worth the effort. You really won’t regret making this. I used a ready made caramel sauce though instead of making a salted caramel because I didn’t wanted salt in mine and it still worked really well.

Definitely, try this!!

Mini Apple Pies

First of all, apologies! It’s been almost a month since I last posted a recipe, ridiculous! For those of you who have Crumbs and Sprinkles on Facebook, you’ll know that I have been working a lot recently… When I say a lot, I mean getting up at 5 in the morning and not getting back from work until midnight. Sufficed to say, I’ve barely had time to bake, let alone blog, which is very saddening! However, today I finally had a day off and not only have I baked my first cheesecake (recipe and photos to come soon), I am also finally able to post about the mini apple pies I made a few weeks ago! I asked my Facebook friends which recipe they’d rather hear about grissini or apple pies and apple pies prevailed so here they are!

Image

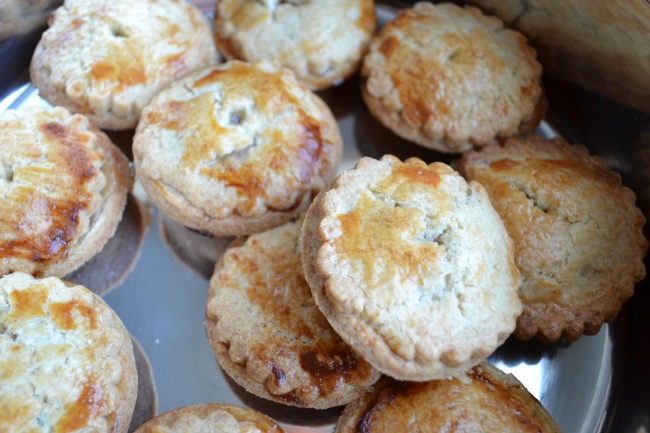
These apple pies went to work with me on a long stint so unfortunately, I could only manage a quick photograph of them in their tin before I went to work but I still think they look almost as good as they tasted! I used a basic sweet pastry recipe and filled it with an apple fruit filling that I added cinnamon to. The result ended in something very addictive… I particularly liked the depth of flavour of the pastry, I think the sugar added an extra flavour to it and the balance between pastry and apple was perfect. These were a lot simpler to make than I thought they would be and produced a delicious snack or dessert.

Mini Apple Pies

Ingredients

350g plain flour

200g cold butter

100g golden caster sugar

pinch of salt

1 egg yolk

2 capfuls of vanilla extract

2 tablespoons water

1 tablespoon milk to glaze

1 can apple fruit filling

Cinnamon to taste

Method

  • Put the flour and butter in a bowl and rub together until the mixture is the consistency of breadcrumbs and then stir in the sugar and salt.
  • Put the egg yolk into the flour mixture with the vanilla essence and stir with a knife. 
  • Add the water gradually and stir with a knife until it begins to clump together, then make a ball with it using your hands and knead until smooth.
  • Put the pastry in the fridge for an hour. Put the apple fruit filling in a bowl and add a sprinkle of cinnamon to it, stir to combine.
  • Preheat the oven to 180C fan and roll out the pastry to about 5mm thick. Cut out circles to fit your cupcake tray (I used a shallow cup rather than a deep muffin tray to ensure a balance between the pastry and apple flavours). Place the pastry circles in the wells of the tray (I greased the wells slightly before doing this but I don’t think it’s always necessary).
  • Fill each cup with the apple mixture but do not over fill, otherwise filling will ooze out of the pies.
  • Re-roll the pastry and cut out smaller circles to make the pie tops. Dab milk along the edge of each pie, place the top circle on and seal each pie.
  • Glaze them with milk and stab the tops once with a knife so that a small hole appears and can allow for steam to escape whilst baking.
  • Cook for 15-25 minutes or until golden brown.
  • Enjoy!

Nutella Biscoff Cookie Bars

Image

Wow! Work’s been  ridiculously hectic recently; I haven’t had a day off in three weeks and that means that I haven’t been able to tell all of you lovely people about these gorgeous nutella cookie bars that I made a few days ago! I always have half a tin of condensed milk left after I make a batch of flapjacks and I never know what to make with them. Thank goodness for this recipe!

Image

I have been eying this recipe for a while now but not had an excuse to try it out yet but this was the perfect reason and I even decided to swirl some biscoff in as well as bits of nutella. The bars were quite crispy and crunchy but the very middle was softer. The combination of nutella and biscoff is fantastic as sometimes you get an intense kick of nutella but sometimes, it’s of biscoff! It added to the variety of each bite and these were completely addictive warm and dipped in cold milk. I used the recipe over at Butter Baking here but I added nutella and biscoff, rather than just nutella. Delicious!

Image

Flapjacks!

Image

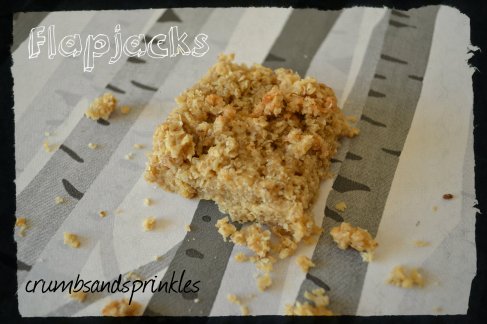
Both my mum and my boyfriend absolutely love flapjacks so they are requested fairly often wherever I am! Given that I was making so many, I decided to develop my own ultimate recipe for flapjacks. Unfortunately, my mum and boyfriend both loved completely different types of flapjack so now I have two perfect recipes!

Image

This recipe is for the gooey and thick flapjack, with a strong demerara flavour, rather than the thin, crispy flapjack with a strong syrup flavour. These are quite rich but always very popular and they’ve been featuring in our lunchboxes all week and proved rather popular at work too! They are so easy to make as well so if you like flapjacks, definitely try this recipe.

Flapjacks

Ingredients

300g butter

340g demerara sugar

4 serving spoons golden syrup

1/2 tin condensed milk

500g good quality oats

Method

  • Melt the butter completely in a saucepan over a low heat.
  • Add the sugar, by sprinkling into the butter to avoid lumps, and melt into the butter completely.
  • Add the golden syrup and mix.
  • Add the condensed milk and mix.
  • Fold in the oats and leave to soak slightly. Ensure that all the oats are covered in the syrup mixture and that the sugar is completely incorporated.
  • Pour mixture into a lined baking tray, don’t squish down.
  • Bake at 160C for about 15 minutes, until it is just brown around the edge and wobbly in the middle.
  • Score where cuts will be but don’t take it out of the pan yet.
  • Leave to cool and then, enjoy! Image